
Drywall patching needs patience and persistence. I am heading to break the process down very easily so you can be more educated before you begin your next dry wall patch. One thing you must consider whenever using drywall is the DUST. When you are delicate to the drywall dust or gypsum you may want to get a particle cover up, safety goggles or even gloves and have on a long sleeve clothing for protection. No longer forget to safeguard any home furniture that you might want to keep dust free, also!
Step1: prep the hole or region to be patched.
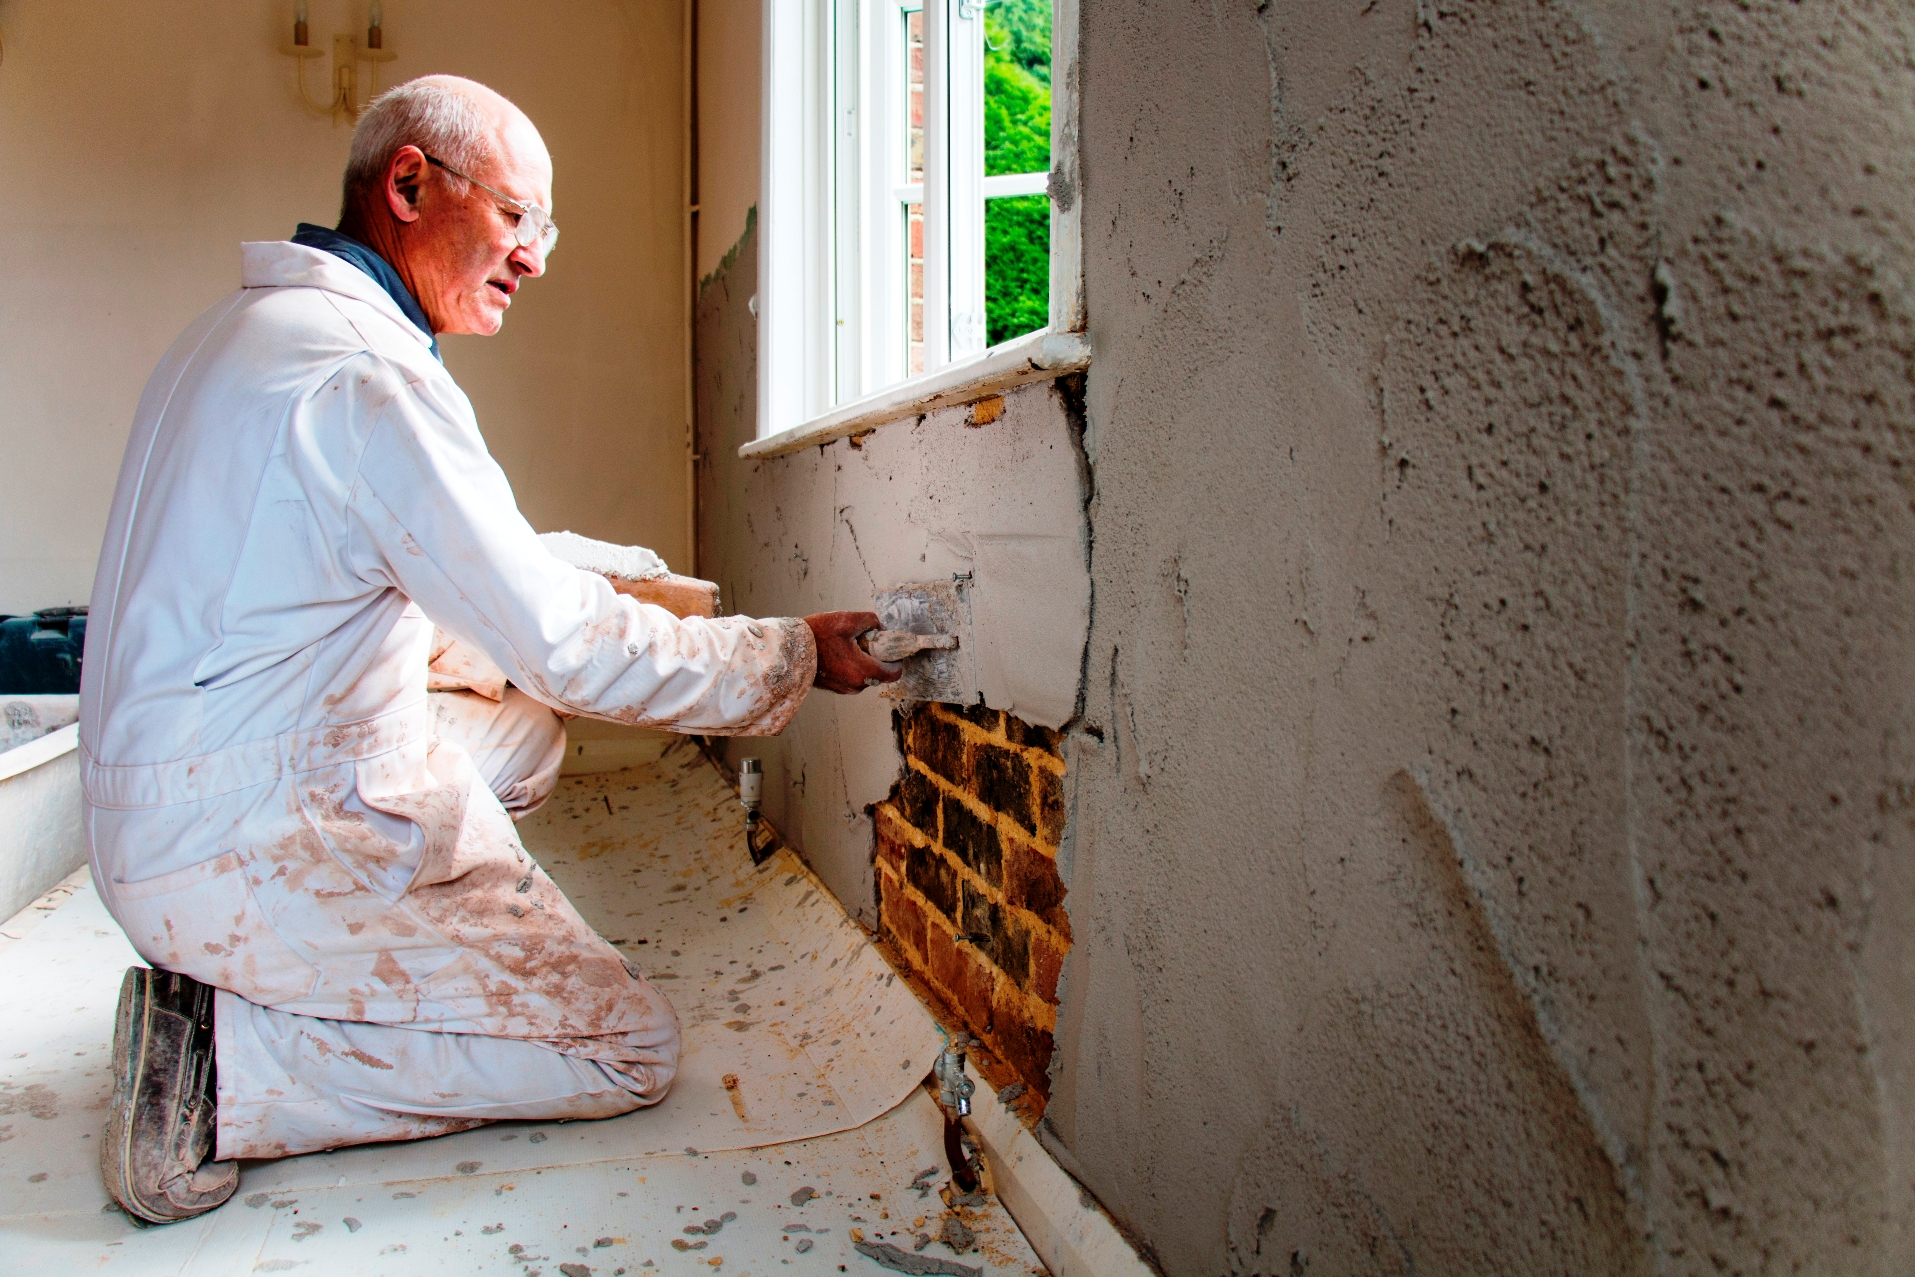
If the hole or even area to get patched has unfastened wall board report you will will need to eliminate the unfastened paper and gypsum. Now in the event the wall structure board paper wishes to continue shredding up the side of the wall, a new way to cease this is typically the take a razor knife and reduce from the free area about a great inch or so. What you are usually doing is scoring the wall so when you rip of the unfastened paper it will certainly arrive at the won line and not necessarily tear further triggering a larger region to need plot work. If following you have eliminated the loose report and the gypsum board underneath will be crumbled and hardly hanging to typically the wall, you have to bump out all typically the loose gypsum. Free paper and gypsum can cause the drywall compound to not really bond strongly and may create a bubble you will see only right after coating with chemical substance. As part involving the prep, you may want to square up the particular hole so a person can more quickly cut the piece of sheetrock that will will fill typically the void.
OK t here fore the area is prepped and now we will have to move to step 2, that may instruct a person on how in order to properly attach the piece of drywall cut to complete the hole within your wall or ceiling.
Step 2: back framing the opening to attach the plaster you will reduce to fill typically the void.
Just just like with new building you will want to have solid wood framing to twist the sheetrock straight into. To explain, I am going to use an example of this patch area regarding one foot by one foot. An individual will need in order to cut a 2x4 into two 16" lengths. You need to collect a cordless or even electric drill and about a dozen 1� " wood screws. Take one of the 2x4's you may have cut and slide it in the hole and behind the existing sheetrock, together one side associated with the hole. The reason the 2x4 is longer (16") than the 12" hole is since we will lengthen it a pair of inches past the top and bottom. So now you then have a 2x4 inside the wall in one side, the particular 2x4 needs to be laying level against the inside the wall, it will certainly not be flipped so the 4" width of typically the 2x4 is smooth against the inside of, this will provide us a greater surface for attachment because apposed towards the common way of mounting which would get with the 2" width facing the sheetrock. You should eye itself, best as is possible typically the 2x4 and divided the difference from the board width involving the existing sheetrock and where you can attach the piece of sheetrock you will cut for the patch. Now that will the 2x4 will be held in the proper position you may need to attach the 2x4 into the existing drywall by holding tightly for the board and screwing into it via the encounter from the existing sheetrock. You are going to set two screws along the edge and one on the top rated and bottom of the existing drywall to strongly protected the 2x4 to take piece of plaster you are going to cut. As soon as you have accomplished one side, duplicate the same process on the other hand. So whenever you have finished back framing at this point you have a strong frame to affix the patch item of sheetrock. 3. Note - when you have a hole in order to patch where right now there are framing, electric powered or mechanical problems in the approach that keep you from sliding the 2x4 behind typically the wall to attach down the part, you can twist within the top plus bottom of typically the 2x4 and this can be sufficient. You can even consider attaching the particular 2x4 back framing across the top and bottom regarding the hole because apposed to fixing the 2x4's on the sides, only use the similar instructions of connection to the sides or top and bottom.
Since the prepare and framing will be complete next many of us will cut the piece of drywall to insert into the framed hole in step a few.
Step 3: get a measurement of the hole and cut an item of sheetrock to be able to fit and protected it.
It will not have to suit super tight although it will will need to fit and even be screwed to the back framing you installed. You should set 2-3 screws straight down either side attaching the particular item of sheetrock an individual cut to the framing. * Note- all the screws will need to be "set" under the surface of the sheetrock but not really deep enough that the screw mind tears the papers face on the sheetrock, unset anchoring screws displays and conflict with the next step. **Note sheetrock also comes in a couple of thicknesses for most household construction -1/2" and even 5/8". �" will be normally on typically the interior walls/ceilings and even 5/8" is utilized on underside associated with stairs as well as in the garage.
Well you're making progress and even you have packed the void using sheetrock, now we will will leave your site and go to the coating or polishing off phase with the dry out wall compound (mud) explained in step some.
Step 4: finish the patch using drywall compound (mud).
As I had been saying in stage 3 the part of sheetrock you cut to load the hole does indeed not have in order to fit super limited. In case the sheetrock you cut has some sort of gap around the border/joint of it and where it complies with the existing wall membrane board, you ought to pre fill the area before using the drywall recording. So just take a little compound and complete the corners and smooth typically the excess flat humor the wall, permit to dry. Up coming is to use the drywall record to ensure that after we all are all finished there will not necessarily be a crack around the articulation of the patched hole. For spot work I prefer to use some sort of "mesh" or "fiber" tape, it supplies a stronger carry and the mesh tape is much more forgiving than regular drywall record, in the considering that you do not have to before mud the wall membrane to adhere typically the tape. The crush tape has some sort of sticky backing, consequently all you do is usually cut the fine mesh tape to the length you require, stick it on the particular wall with typically the middle of typically the mesh tape working right in series with the shared or crack. The particular mesh tape should always run previous the joint at the least an inch. Continue this process for most four sides of the patch. Next apply a layer of compound all-around the perimeter of the patch, over the particular mesh tape. Typically the mesh will end up being slightly visible following only one coating. * Note : If you utilize to much substance (mud) you will have hump in the surface area. Allow this coating to dry, sand lightly, mostly in order to knock of any kind of knife edges that dried in typically the compound and may result in the next coating to build way up to much. You may not want to try and mud the particular patch in only 1 coat, this is better to utilize a moderate/thin cover allow to dry out, sand and coating again. After almost all the coats (at least two) have got dried and then youâre satisfied that the area is coated evenly, sand the soil to even the particular surface. * Be aware - a much less than perfect covering job can be smoothed out with sanding. Sanding together the outside edge of the dirt too, will mix the patched region better into the existing surface. The really neat technique is once you have sanded the patch, acquire a wet sponge or rag and even "wash" the exterior mud of the patch blending it even better in the existing surface, this trick will aid you avoid viewing a mud line around the plot when it will be completed. If your home has a smooth texture, this is usually the last stage, your ready to color. If Additional hints do not have a smooth texture you will need to study on.
Only 1 more step in addition to the drywall element of your spot will be full, texture. We will discuss various textures and how in order to apply the inside step 5.
Stage 5: there are many textures and even you must first know how in order to identify your pre-existing texture before going forwards.
Older homes may well have a beat, crows foot, palm or smooth structure. Newer homes for the most part use smooth, red peel, knockdown plus hand textures. For the crows foot you will want a crows feet or stomp structure brush. For beat texture you may have to consult some sort of dry wall distributor store to the right texture brush or perhaps experiment with some different brushes. For a hand texture you can use a dry wall structure knife or scoop. All of the above mentioned construction require an application or brush to apply drywall compound to achieve the particular texture. The following two textures could be purchased within a spray can, orange peel and knock down. 5. Note - system textures it is usually good to find an old piece of plywood or card and experiment very first to find the right amount involving pressure, thickness regarding mud, technique and place up time to be able to create the right look to best conceal that a new repair was ever made. Just about any in case you texture typically the wall and are unhappy with the results you can was the particular texture of right away with a damp sponge of rag, allow to dry out and try texturing again or mud of any bad consistency or else happy along with it after that has been authorized to dry. 5. Note - Knockdown texture size can be manipulated by simply letting the sprayed on texture set up or dry for sale or more moment based on the desired glimpse.
We certainly have discussed typically the 5 steps desired to professionally fix a drywall spot. 1) properly prepare the area being patched. 2) back again frame the starting. 3) size plus cut the plaster to fill the particular opening. 4) use mesh tape and mud to smooth the. 5) select and apply appropriate structure.
So go out and about and "get your current drywall on". A person can check away my article on painting walls if you require assistance with the particular painting. Feel no cost to leave a new comment about any other subject you would likely like me to be able to write on related to drywall. Please examine out our website, dennardbloss. com, it really is all about our design finishes.